Table of Contents:
- Why People Remove Old Window Tint
- DIY vs Professional Tint Removal
- Our Step‑by‑Step Window Tint Removal Process
- Cost of Window Tint Removal Near You
- How to Prepare for Your Appointment
- Why Choose Us for Tint Removal
- FAQs About Tint Removal & Window Tinting
- Next Steps: Refresh Your Glass With New Film
Old tint can make a clean car look neglected, make night driving harder, and put fragile rear-window components at risk if it is removed the wrong way. If you are searching for window tint removal near me, the goal is simple: remove the failing film, protect the glass, and get a clear, safe result without wasting your day.
Below, you’ll learn what to expect from a professional appointment, how pricing works, why DIY removal can go wrong, and how to get your vehicle or residential windows ready for service.
Quick Answer: How to Get Window Tint Removed Near You Today
Professional window tint removal is available for cars, trucks, SUVs, and residential windows. For most vehicles, tint removal can take between 1 to 3 hours, depending on the number of windows, the condition of the existing tint, and whether the rear glass has defroster lines or an integrated antenna.
A trained technician can remove old window tint, bubbling window film, and leftover adhesive without scratching the glass or damaging seals, antennas, electronics, or rear defroster lines. The safest method for removing window tint uses heat and moisture to liquefy the glue, then careful tools and cleaning products to finish the job.
Pricing is usually straightforward. Individual window tint removal costs range from $15-$60, while professional tint removal costs between $100-$400 for a full vehicle. Some tint removal services can be up to 50% cheaper than franchise dealers, especially when you book directly with a local shop. Same-day and next-day appointments may be available depending on schedule, so request a quote online or call to reserve your spot.
Why People Remove Old Window Tint
Most previous tint eventually breaks down. Lower-grade dyed film may show problems after 3–5 years, while better carbon or ceramic products can last much longer when installed correctly. Heat, UV exposure, moisture, and poor installation all speed up fading and adhesive failure.
When old window tint starts failing, removal is not just about appearance. It can affect safety, privacy, legal compliance, and the functionality of the rear defroster.
Common reasons to remove tint include:
- Cosmetic problems such as purple discoloration, peeling edges, bubbling, and uneven layers that make the vehicle look older than it is.
- Safety concerns such as distorted visibility at night, hazy rear windows, and reduced clarity during rain or fog.
- Legal reasons such as outdated darkness levels, recent fix-it tickets, failed inspections, or changing tint laws in your area. Searches like “window tint removal near me california” are common because california drivers often need to balance privacy with legal visible-light limits.
- Comfort and technology upgrades, especially when replacing low-grade dyed window film with ceramic, nano-ceramic, or nano-carbon tint for stronger heat rejection, UV protection, and better optical clarity.
- Lease return, resale, or repair needs, where removing the material helps restore a factory-clean look before selling or returning a car.
Window tint is constructed of multiple layers that may leave adhesive behind after removal. Even after tint removal, a layer of glue often remains on the glass. That is why professional removal matters: aggressive scraping can cause permanent damage to glass, defroster grids, antennas, trim, and other underlying surfaces.
DIY vs Professional Tint Removal
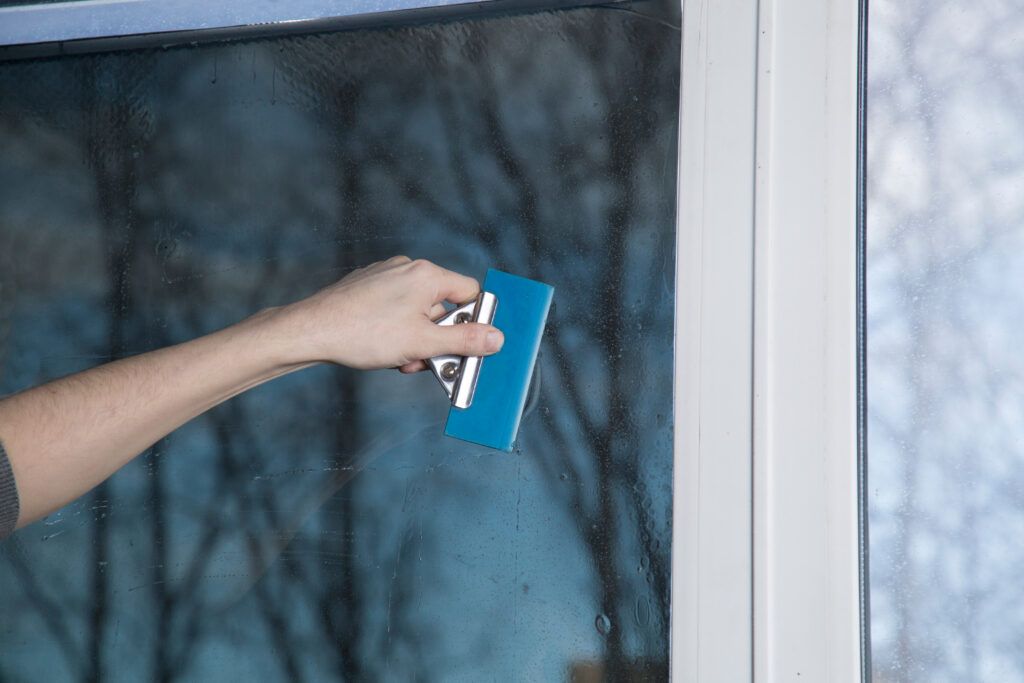
DIY tint removal looks easy in short videos, but the real task often takes more patience than expected. The challenge is not only peeling off the tint; it is removing the glue without leaving haze, scratches, or patchy remnants.
Common DIY approaches include:
- Using a fabric steamer, which is effective for softening window tint adhesive when used carefully.
- Applying a heat gun to loosen the adhesive bond for window tint removal.
- Using soapy water and a black trash bag to trap heat, a common method that helps warm the film and adhesive.
- Peeling the film by hand after the adhesive begins to soften.
- Cleaning residue with dish soap and water, which is a common solution for cleaning residue after tint removal.
- Scraping adhesive with improvised tools, chemicals, or razor blades.
The problem is that each shortcut adds risk. Scraping with razor blades commonly causes scratches and damage to glass. Improper removal can lead to scratches or cracks in windows. DIY removal may leave patchy remnants on windows, which makes the rest of the cleanup harder and can interfere with new tint installation.
Rear windows are especially sensitive. DIY tint removal can damage defroster lines, and cutting defroster lines disables the defroster. Damaging the radio antenna can occur during DIY removal, especially when the antenna is embedded in or applied to the rear glass. Improper tint removal can damage defroster lines and antennas.
Professionals use a different approach. Professional tint removal uses specialized chemicals and tools, including controlled steamers, safe adhesive removers, plastic blades, and protective coverings. Professionals avoid using razor blades during tint removal, especially around rear windows, antennas, seals, and delicate surfaces. Use plastic blades on rear windows with defroster lines to avoid damage.
The combination of moisture and heat softens the glue during window tint removal. However, it is important to use caution when applying dry heat to avoid damaging glass, rubber seals, plastic trim, or interior panels. That is one reason a professional window tint removal appointment is usually safer and faster than an entire weekend of trial and error.
For any rear window with defroster lines or integrated antennas, professional removal is the smart choice.
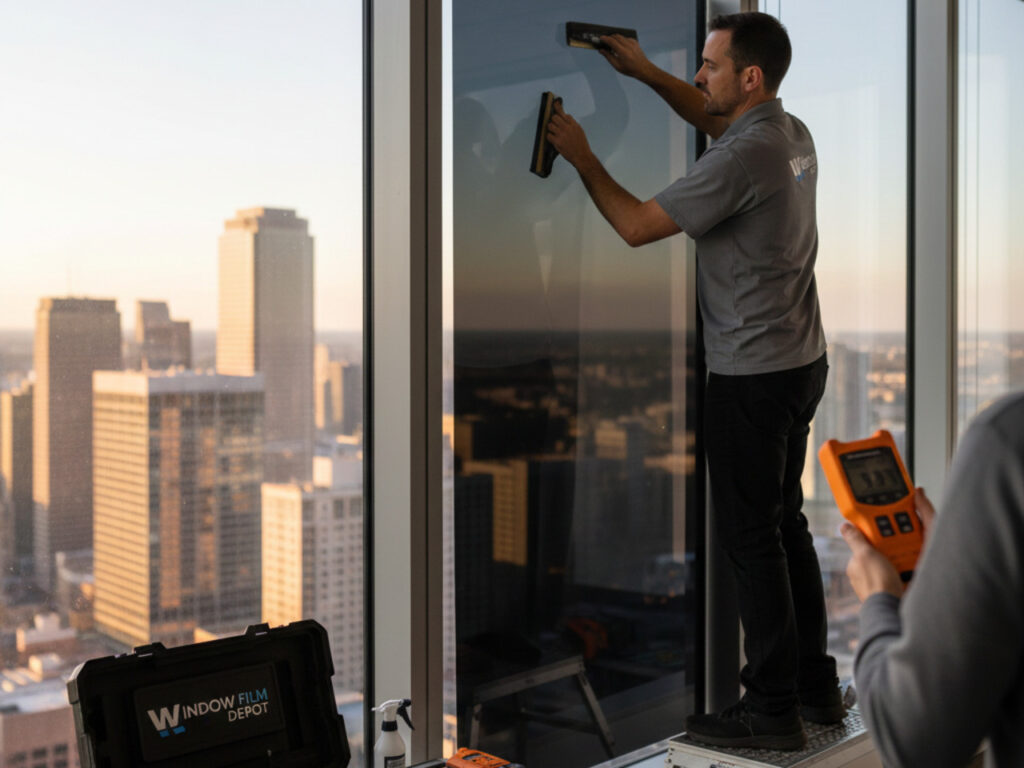
Our Step‑by‑Step Window Tint Removal Process
Every vehicle, home, and window has specific needs. A newer ceramic film on a flat side window is different from old dyed film baked onto curved rear glass. Our process is designed to remove the previous tint carefully while maintaining the condition of the glass and surrounding trim.
Here’s what you can expect:
- Initial inspection
We check the film type, the age of the existing tint, whether there are two layers or more, and the condition of windows tinted previously. We also look for chips, cracks, factory privacy glass, built-in antennas, defroster lines, and any signs of prior repair. - Prep work
We cover seats, dashboards, door panels, rear decks, and nearby electronics. This protection helps prevent moisture, adhesive remover, or loosened material from getting where it should not. - Softening the film
We use controlled heat and moisture to soften the film and adhesive. A fabric steamer is often preferred because moisture helps loosen glue more evenly than dry heat alone. The goal is to soften the adhesive without overheating glass. - Careful film removal
Once the adhesive bond is loose, we lift an edge and remove the film in large sections whenever possible. This reduces tearing, minimizes leftover glue, and helps avoid damage around seals, defroster lines, and antennas. - Adhesive removal
After the tint is removed, we apply professional-grade adhesive remover and use non-metal tools to clear the glass. This step may need to be repeated because old glue can be stubborn, especially on film that has been exposed to years of sun. - Final cleaning and inspection
We clean the inside and outside of the glass for a streak-free finish. We also check the defroster, nearby electronics, seals, and overall clarity. The finished goal is a flawless result with no adhesive residue left behind.
This careful process is the difference between “the film is off” and “the window looks clean, clear, and ready for new installation.”
Cost of Window Tint Removal Near You
The cost of window tint removal depends on the vehicle, the number of windows, how long the existing window film has been applied, and whether the adhesive has baked into the glass. A small side window is usually simple. A curved rear window with defroster lines requires more care, time, and precision.
Typical 2026 price ranges include:
| Service type | Typical price range | Notes |
|---|---|---|
| Individual window | $15-$60 | Depends on size, film condition, and glue residue |
| Rear window with defroster | Often higher than side windows | Extra care is needed around defroster lines and antennas |
| Full vehicle | $100-$400 | Based on vehicle size, number of windows, and film condition |
Very old, baked-on, or multi-layered tint may cost more because the job takes more hours and more careful cleanup. If your car has multiple layers, heavy bubbling, or glue that has turned cloudy, expect additional labor.
A standard quote usually includes:
- Complete tint removal from the selected window or full vehicle
- Adhesive cleanup
- Basic glass cleaning
- Disposal of removed film
- Inspection of the finished glass
For the most accurate estimate, send photos or provide your vehicle year, make, model, and which windows need work. If you plan to add new window tinting installation on the same visit, ask about bundle options. Combining tint removal with new film installation can often be a better investment than booking the services separately.
How to Prepare for Your Tint Removal Appointment
A little preparation helps the technician work faster and protects your belongings. It also helps ensure the final glass is as clean as possible.
Before your appointment:
- Remove valuables and loose items from seats, door pockets, cupholders, and rear decks near the windows being serviced.
- Do a quick interior clean around the glass to reduce dust, pet hair, and debris.
- Tell us if the vehicle has rear defroster lines, built-in antennas, aftermarket electronics, or recent glass repair.
- Check local window tint laws if you want new tint installed immediately after removal, especially for front side windows and the windshield strip.
- Plan for the right amount of time. Removing window tint can take 1 to 3 hours for vehicles, with larger SUVs, trucks, and heavily damaged film sometimes taking longer.
- If you choose mobile service, make sure there is safe parking, enough space to open doors, and access to the vehicle. For a shop visit, mention height limits or oversized tires if you drive a larger truck or van.
If the glass is part of a residential home project, let us know the window size, whether the film is interior or exterior, and whether the window receives direct afternoon sun. Residential film can be more delicate, especially when it has been on the glass for many years.
Why Choose Us for Professional Tint Removal
Choosing the right tint removal service is about more than price. The wrong method can turn a simple job into damaged glass, failed defroster functionality, or a costly replacement.
Here’s how we approach the work:
- Experienced technicians
Our team has years of experience with window tinting, tint removal, and modern window film products. That means we know how different film types react to heat, moisture, and adhesive removers. - Care around sensitive components
We focus on maintaining defroster lines, factory radios, antennas, seals, door panels, and electronics. This extra care helps avoid permanent damage. - Proper tools and materials
We arrive equipped with steamers, safe solvents, absorbent pads, plastic tools, and cleaning products designed for automotive and residential glass. - Transparent pricing
We explain the job before work begins. If old adhesive, two layers of tint, or unusual glass conditions require extra time, we review the options before moving forward. - Convenient scheduling
Depending on availability, we offer clear appointment windows, quick turnaround, and service options that fit your specific schedule. - Clean finished results
The goal is crystal-clear glass, no leftover adhesive haze, and a surface that is ready for fresh tint, clear UV protection, or legal-limit privacy film.
Good tint removal should make your window look as if the old film was never there.
FAQs About Tint Removal & New Window Tinting
Here are the questions customers ask most before booking tint removal services.
How long does professional window tint removal take?
For most vehicles, professional window tint removal takes 1–3 hours. A few side windows may be done more quickly, while a full vehicle with old, peeling, or baked-on film can take longer. Rear glass with a defroster requires additional care.
Can you remove just the rear window tint or one damaged window?
Yes. You can book removal for one window, the rear glass, or the full vehicle. Partial removal is common when one section is bubbling, scratched, illegal, or blocking visibility while the rest of the tint is still in good condition.
Will tint removal damage my defroster or radio antenna?
Professional removal is designed to protect these components. The risk is higher when the old window tint is brittle, the glue is baked on, or the defroster lines are already compromised. We use controlled moisture, heat, and plastic tools to reduce the risk, but we will point out visible concerns before the work begins.
Can you install new window tint right after removing the old film?
In many cases, yes. If the glass is fully clean, dry, and free of adhesive, new tint can often be installed during the same appointment. Curing time still applies after installation, and weather, humidity, and film type can affect how long the new film takes to fully settle.
What types of window film do you recommend after removal?
It depends on your goals:
- Dyed film is usually the lowest-cost option, but it is more prone to fading and color change.
- Carbon film offers better durability and a cleaner look than basic dyed tint.
- Ceramic film provides stronger heat rejection, excellent clarity, UV protection, and no signal interference for most electronics.
If your priorities are heat control, comfort, and long-term value, ceramic or nano-ceramic options are often the best choice.
Is window tint removal covered by insurance or warranties?
Standard auto insurance usually does not cover tint removal unless it is tied to a covered glass claim. Film warranties may cover bubbling, fading, peeling, or adhesive failure, but coverage depends on the product, installer, and warranty terms. We can provide documentation of the window condition and completed work when needed.
Need More Info?
The Window Film Depot team is happy to help.
Next Steps: Refresh Your Glass With New Window Film
Removing old tint can immediately enhance visibility, comfort, safety, and the appearance of your car, truck, SUV, or home. It also gives you the chance to upgrade from failing film to a cleaner, more advanced product.
Your next steps are simple:
- Request a quote online or call to schedule window tint removal this week.
- Ask about upgrade paths such as clear UV protection film, legal-limit privacy tint, or heat-blocking ceramic options.
- Choose professional removal to protect the glass, avoid adhesive residue, and keep your vehicle looking clean.
- Consider same-visit installation if you are ready for fresh window tint after the old film is removed.
If your tint is bubbling, peeling, too dark, or hard to see through, now is the time to fix it. Book your tint removal appointment this week and get back to clear, safe, streak-free glass.

