Window film is a thin polyester laminate applied directly to existing glass – no window replacement required. In 2026, more homeowners are choosing to install window film for energy efficiency, privacy, glare reduction, and UV protection at a fraction of the cost of new glazing. Whether you tackle a single bathroom window or hire a crew for your entire home, the installation process follows the same core principles.
This guide walks you through everything from gathering materials needed to squeegeeing out the last air bubbles.
Table of Contents:
Introduction: Why Home Window Film Installation Matters in 2026
Instead of tearing out perfectly good glass, homeowners are applying solar control, decorative, and security films to the interior glass surface of their existing windows. The appeal is straightforward: window film is a cost-effective DIY upgrade for home comfort, and professional film installation can cover an entire house in a day or two with minimal disruption.
The real-world payoff is tangible. Installing window film reduces glare from sunlight in south‑facing home offices, lowers cooling bills during brutal summers, and prevents fading of furniture and flooring caused by UV exposure. Window film enhances privacy without blocking natural light – though you should not assume reflective films provide privacy at night when the inside is brighter than the outside.
This article gives you a practical step-by-step guide: from measuring window dimensions and cleaning the glass surface, through carefully applying and positioning the film, to trimming excess film and handling remaining air bubbles. It also covers when DIY film installation makes sense versus when calling a professional is the smarter move.
Key Benefits of Installing Window Film at Home
Modern window film installation improves comfort, safety, and energy performance whether your home has 1980s single‑pane glass or 2010s low‑E insulated units. The technology has matured significantly – spectrally selective ceramic films now reject heat without the mirror‑like exterior appearance of older metallized products.
Here’s what quality film delivers:
- Energy efficiency: Window film can block up to 80% of incoming solar heat. Solar control film rejects up to 82% of solar energy, and window film reduces energy bills by cooling your space during peak summer months.
- Glare reduction: Cuts harsh sunlight in home offices and TV rooms, reducing eye strain when working on screens near large windows.
- UV protection: Window film blocks 99% of harmful UV rays, protecting artwork, carpets, hardwood floors, and wood finishes from premature fading.
- Privacy: Frosted and decorative film options obscure views from the street without requiring curtains or blinds – an excellent way to handle bathrooms and street‑side living rooms.
- Security: Thicker safety films hold shattered glass together on impact, adding shatter resistance for vulnerable sliding doors and ground‑floor windows.
A typical high‑performance solar control window film can drop a window’s Solar Heat Gain Coefficient from roughly 0.70 down to about 0.28, translating to 60–78% less solar heat entering your rooms. The result is more even temperatures, fewer hot spots near large glass doors, and noticeably lower AC runtime.
Tools and Materials Needed for a Smooth Window Film Installation
Having everything ready before you start prevents creases, trapped dirt, and wasted material. Window films typically come in 36-inch or 48-inch widths, so determine which size covers your largest pane before ordering.

- Film type: Choose based on your goal – solar control film for heat, privacy window film for bathrooms, decorative film for interior doors, or safety/security film for vulnerable glazing.
- Spray bottle filled with soap solution: water plus a few drops of baby shampoo (roughly one teaspoon per quart) or a dedicated slip solution.
- Rubber squeegee (6‑inch) and a hard‑edge plastic squeegee designed for film installation. A rubber squeegee is essential for removing air bubbles.
- Stainless steel razor scraper for removing paint specks, tape residue, and debris at a shallow angle to avoid scratching.
- Sharp snap‑off utility knife or precision blade for trimming. Use a sharp utility knife for trimming excess film – dull blades drag and tear.
- Tape measure and fine‑tip marker for accurate measurements. A tape measure is essential for accurate window measurements.
- Lint-free cloths or microfiber towels and a non‑abrasive sponge.
- Drop cloths to protect sills, hardwood floors, and furniture from overspray.
A spray bottle filled with water and soap is needed for application. Installation kits often include a squeegee, spray bottle, and utility knife, which cover the basics. Do not use ammonia‑based glass cleaners on installation day – they leave residue that interferes with the adhesive on many films.
Pre‑Installation Preparation: Clean, Measure, and Wet the Window
Proper glass preparation is crucial for a professional-looking installation. Around 70–80% of a flawless application depends on what happens before the film touches the glass. If the glass surface isn’t spotless or the measurements are off, air bubbles and edge lifting are almost guaranteed.
Choose the right film. Match the film type to your goals: glare reduction for a bright family room, privacy film for a street‑level bathroom, or thicker safety film for basement doors.
Measure accurately. Use the tape measure to record window dimensions from gasket to gasket in both directions. Trim the film about 1 inch larger than the window size so you have enough excess film for clean cuts along the window frame.
Clean thoroughly. Thorough cleaning before installation prevents dust from being trapped under the film. A spotless window is critical to avoid bubbles during film installation. Use a mixture of water and baby shampoo for cleaning:
- Wet the window with the soap solution from top to bottom using the spray bottle.
- Press the stainless steel scraper at a shallow angle across the glass to remove invisible contaminants – paint overspray, tape residue, insect marks.
- Squeegee the glass dry, then wipe the window frame and sill with a lint-free cloth to keep dirt from washing back onto the glass.
Wet the window again immediately before applying the film. This water layer lets the film slide for precise fit positioning and prevents dry spots that trap air.
Direct sunlight can cause the application solution to dry too quickly during installation, so work on a mild, overcast day or during morning and late afternoon hours. Avoid very cold conditions that prevent proper curing.
Step‑by‑Step Guide: How to Install Window Film Like a Pro
This is the core step guide – a chronological, room‑tested process for installing window film on standard interior glass using a typical 36‑ or 48‑inch roll.
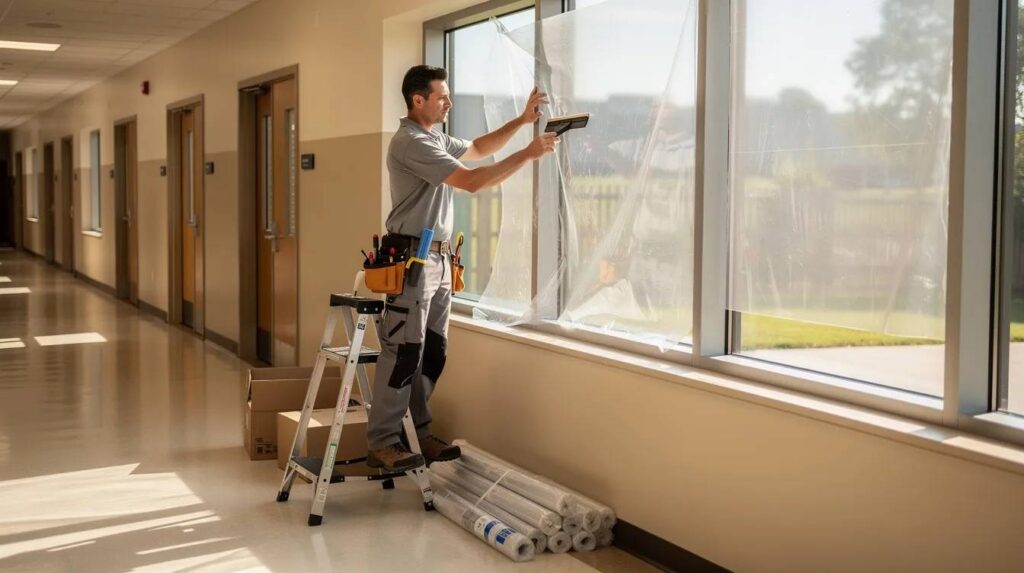
- Cut the film to size. Lay the window film roll onto a clean, flat surface and cut it roughly 1 inch larger than the measured glass in both width and height. This gives you excess film to trim away cleanly.
- Wet the window. Spray a generous, even layer of soap solution on the cleaned glass. Make sure all edges are fully wet so the film never contacts dry glass. Using a soapy solution allows the film to slide into position during application.
- Separate the protective backing. Place two small pieces of tape on opposite corners of the film to peel the clear backing away. Spray installation solution onto the adhesive side as it is exposed – never let the adhesive side touch itself, or it can crease permanently.
- Apply the film. Carefully place the adhesive side against the wet window, starting at the top edge and letting the excess hang below. Smooth the center gently by hand, so it adheres lightly.
- Position for a precise fit. Slide the film wet into final position, leaving about a 1/16‑inch gap from the window frame so the material doesn’t bind against the edge.
- Squeegee from the center out. Spray the exterior face of the film, then use the soft squeegee to press excess water and remaining air bubbles toward the edges. Squeegeeing from the center outward helps remove trapped air and water bubbles. Work in overlapping strokes – avoid dry passes.
- Trim excess film. Use a sharp blade and a hard squeegee as a guide to cut away excess solution and film along the gasket or frame line in one smooth motion. Snap off to a new blade segment after every 1–2 windows to achieve clean edges.
Keep the film wet on the exterior while you squeegee to avoid scratching. After trimming, remove excess water from the edges with a soft cloth and wipe the window frame clean.
Some haze or small water pockets are normal after the application process and will clear over one to four weeks as moisture evaporates. Allowing window film to cure typically takes several weeks for moisture to evaporate – this is expected, not a defect.
Troubleshooting Common Window Film Installation Problems
Even careful DIY installers encounter air bubbles, edge lifting, or trapped specks. Most minor issues are correctable while the film is still wet.
- Air bubbles: Determine whether a bubble contains air or trapped water. For air bubbles, lightly lift the nearest corner, wet both the glass and film, and re‑squeegee from the center toward the lifted corner until the surface is bubble-free.
- Fingers and creases: Long, narrow bubbles at edges (called “fingers”) can be smoothed by re‑wetting and working them slowly toward the frame before the adhesive fully sets.
- Dust or debris under the film: If a speck is visible and bothersome, lift a small section, rinse the area with solution, and lay the film back down. Tiny imperfections near corners are often invisible once the film cures.
- Edge lifting: Inspect edges over the first 48 hours. Lightly press them back with a wrapped squeegee if they start to curl while still damp.
Never use sharp objects to “pop” bubbles – this leaves permanent holes. Don’t apply heat guns unless the film manufacturer explicitly allows it. If you encounter heavy contamination, large creases that won’t lay flat, or a security film that must meet safety standards, it’s better to remove window film entirely and restart the installation.
DIY vs. Professional Home Window Film Installation
Small projects – a single bathroom window start, a home office, or decorative film on interior cabinet glass – are reasonable for handy homeowners. Larger scopes shift the math toward professional installation.
DIY advantages:
- Lower upfront cost for small areas (film material runs $1–$5 per square foot)
- Flexible timing on your schedule
- Good learning opportunity before tackling more complex applications
Professional advantages:
- Access to higher‑performance commercial‑grade solar control and security films not available through retail
- Experienced crews who complete entire homes in a day, including tall stairwell glass and large picture windows
- Warranty protection – many manufacturers require certified film installation to maintain coverage
DIY risks to consider:
- Cutting into gaskets or scratching tempered glass with dull blades
- Poor curing in humid basements or very sunny exposures
- Safety concerns on ladders around tall transom windows
Professional installation costs typically fall between $7 and $24 per square foot depending on film type, but quality installations last 10–20 years. Compare that against a DIY film costing $60–$100 that may degrade in 2–3 years. Consider your project scope, comfort with tools, and goals – energy savings, privacy, security – when deciding.
Home Window Film Installation FAQs
These FAQs address the specific questions homeowners ask most before scheduling a film installation or starting a DIY project.
How long does window film installation take for a typical home?
A single 3‑foot by 5‑foot window takes a careful DIYer about 30–45 minutes. Professional crews typically cover 150–250 square feet of glass in a full day, depending on access and complexity. Extra time is needed for final cleaning, moving furniture, and protecting floors.
How long does it take window film to dry and fully cure?
Most residential window films appear surface dry within a few hours. Allow up to 30 days for the film to fully cure, especially thicker security films or installations in cool, shaded rooms. Don’t pick at edges, place stickers, or clean aggressively during the curing period.
Can I install window film on any type of home window?
Most clear, smooth interior glass is suitable – single‑pane, double‑pane, and tempered glass all work. Some specialty coatings and textured glass are not recommended for standard solar films. Check manufacturer guidelines for compatibility with insulated glass units and low‑E coatings to avoid seal failure or thermal stress issues.
How do I clean my windows after film installation?
Avoid cleaning window film for 30 days after installation. Once cured, use a soft cloth and a mild cleaner; clean window film with water and Dawn dish soap solution. Avoid ammonia-based products to prevent film degradation. Never use abrasive pads or razor blades on the film surface.
Will window film damage my glass or void my window warranty?
High‑quality, properly specified films are designed to be compatible with standard residential glazing and should not damage glass when installed correctly. Some window manufacturers require specific film types or certified installers to maintain glass breakage or seal failure coverage. Review your window warranty terms before proceeding.
Is window film removable if I want to change styles later?
Most adhesive window films are permanent in daily use but can be removed later using heat, steam, and adhesive remover. The film itself typically cannot be reused. Non‑adhesive cling films exist for temporary applications, but they perform differently and last only one to three years compared to professionally installed solar or security films.
Why Choose Window Film Depot for Residential Window Film Installation
Window Film Depot is a family‑owned company founded in 1992, specializing in high‑performance window film and architectural surface solutions for both homes and commercial buildings. With over three decades of hands‑on experience, the team brings a level of precision and material knowledge that generic handyman services simply cannot match.
- Over 30 years specializing in solar control film, privacy film, decorative glass finishes, anti‑graffiti film, and security glazing upgrades
- Turnkey project management for homeowners who want fast, clean installations with minimal disruption – even on large properties or multi‑story glass
- Access to advanced spectrally selective films used in government, education, and retail environments, now available for residential projects
- A nationwide network of trained installers who follow consistent film installation standards and manufacturer best practices
- Wholesale film supply for trade partners and contractors, so homeowners working with local builders still get compatible materials and expert guidance
Professional installation through Window Film Depot protects film warranties, ensures long‑term performance, and delivers a clean, uniform appearance across every window in your home.
Next Steps: Schedule Your Home Window Film Installation
Window film is one of the fastest, most cost‑effective ways to improve comfort, cut glare, and boost privacy without replacing a single pane of glass. Whether you need solar heat rejection on sun‑blasted west‑facing rooms or security glazing on ground‑floor doors, the right film paired with proper installation delivers results that last a decade or more.
Ready to get started? Contact Window Film Depot by phone or web form for a free consultation. Share basic details – number of windows, approximate sizes, primary concerns (heat, glare, privacy, security), and your location – to receive a tailored recommendation. Ask about sample films so you can see the effect on natural light and views before committing.
Whether you want a full professional assessment or wholesale film supply for a DIY project, the team is ready to help you find the right fit.